
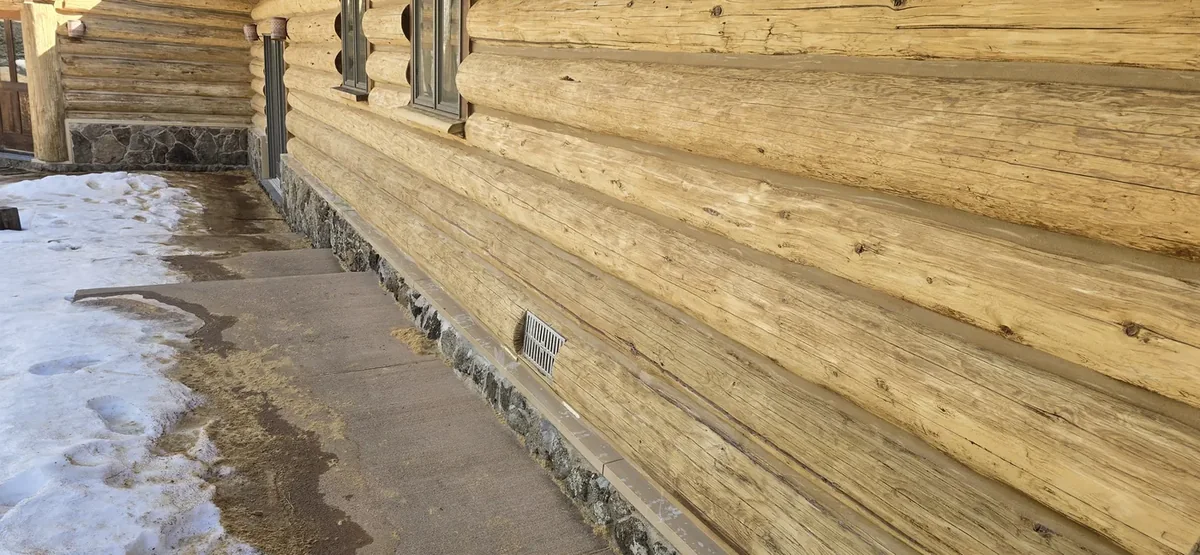
Walk up to a log home in Cuchara or La Veta and you will see two different sealants doing two different jobs, often on the same wall. Most owners call all of it "chinking." That shorthand is fine in conversation, but it hides the thing that actually decides whether your walls stay tight: the joint itself. We have re-done plenty of seams around Huerfano County where the product was good, the color was right, and the whole line still tore open in two winters because of how it was installed.
The short version of the difference
Chinking is the wide, textured, mortar-looking band you see between log courses. It is an elastic sealant designed to span a gap, and on a traditional hand-hewn or square-log home it is a defining part of the look. Caulking is the same family of material with a smoother surface and usually more stretch, sized for the narrow stuff: butt joints, corner notches, checks in the log face, window and door perimeters, and the tight seams on a milled or scribed home that was never meant to show a chink line.
Neither one is a better product. They are different sizes of the same idea. A modern log home frequently needs both, and picking the wrong one for a given seam is how you end up with a repair that looks obviously patched even when it holds.
Backer rod is the part that decides everything
Here is the piece almost every failed joint has in common. Backer rod is a foam rope you press into the gap before the sealant goes in. Most owners assume it is filler, a way to use less product. It is not. Backer rod is a bond breaker. Sealant will not stick to it.
That matters because of how the joint has to move. A log wall is never still. Logs shrink as they dry, swell when the weather turns, and settle over years. A joint sealed correctly grabs the log above and the log below and nothing else. Two points of adhesion. When the wall moves, the sealant stretches between those two points like a rubber band and comes back.
Leave the backer rod out and the sealant bonds to three surfaces: top log, bottom log, and the back of the gap. Now it cannot stretch. The next time the wall moves, something has to give, and what gives is a tear straight down the middle of your chink line. That is the crack you are looking at right now if you are reading this on your phone standing next to the wall.
Joint size is not a guess
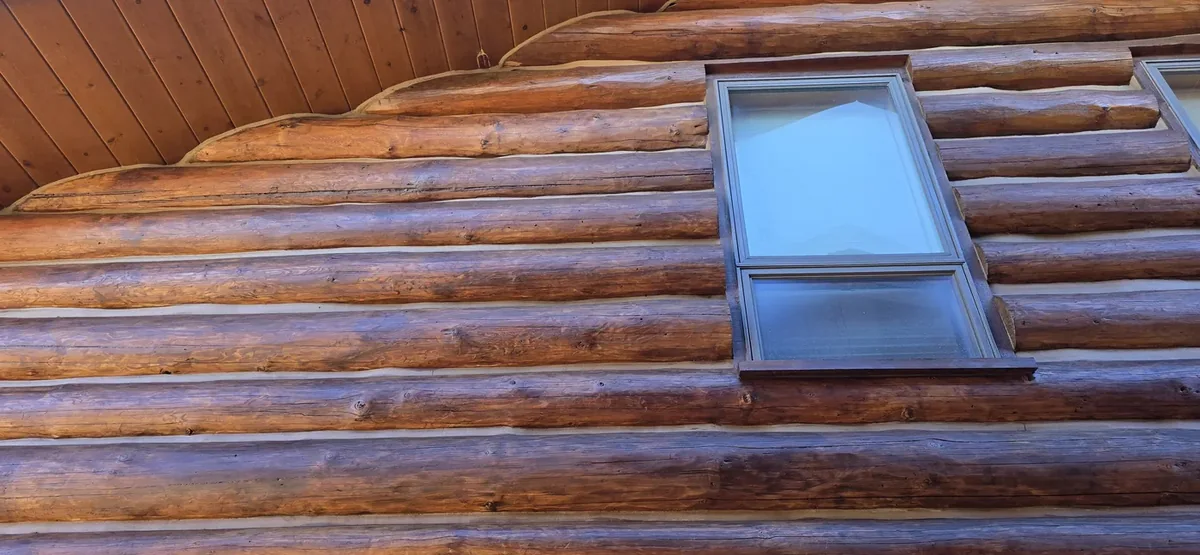
There are real numbers behind a good seam. Width is roughly a sixth of the log diameter, so an eight inch log wants a chink line around an inch and a third, and a ten inch log wants something closer to an inch and a half. Depth is about half the width, and in practice you want it no thinner than a quarter inch and no thicker than half an inch.
That depth rule surprises people. Thicker feels stronger. It is not. A sealant bead that is too deep is stiff, it cannot flex across its span, and it pulls away from the wood instead of stretching. Too thin and there simply is not enough material to survive the movement. The proportions are what let the joint work, which is why a correctly installed line is slightly hourglassed in profile: thinner in the middle, thicker where it meets each log.
Get the ratio right and, on the rare occasion a joint is pushed past what it can handle, it fails cohesively. The sealant tears inside itself instead of releasing from the log. That is the good kind of failure, because the repair is a straightforward re-tool rather than a full strip-out.
Why joints fail on Colorado log homes specifically
Elevation makes all of this harder. Southern Colorado hands a log wall a daily freeze-thaw swing for months at a time, brutal UV, and single-digit humidity. Wood moves more here, more often, than the product literature written for a milder climate assumes.
Three failure patterns show up again and again on the homes we service:
- Adhesive failure: the bead lets go of the log face cleanly, leaving a gap you can see daylight through. Usually three-point adhesion, and sometimes an incompatibility between the sealant and the stain or clear coat underneath it.
- Cohesive tearing: a split running down the center of an otherwise well-bonded line. The joint was undersized or installed too deep for the movement it had to absorb.
- Surface crazing: a web of fine cracks in the face of the bead. Often a product applied outside its temperature window or over a damp or dusty surface.
Temperature matters more than most people expect during application. Most chinking wants to go on between about 50 and 90 degrees, on a wall that will stay in that range while it skins over. In our shoulder seasons that can mean working the shaded elevations in the afternoon and the sunny ones in the morning, which is exactly the sort of scheduling that separates a seam that lasts from one that does not.
Cosmetic crack or failed seal? Two checks
Not every crack is an emergency. Before you panic about a mile of chink line, do two things.
First, press it. Push a thumb firmly into the bead along the crack. If the sealant is still soft and elastic and the crack is only in the surface skin, you are usually looking at crazing, which is ugly but is not letting water past. If the material feels hard and chalky, or your thumb moves the whole bead, the seal is done.
Second, look for daylight and dirt. From inside, on a bright day, run your eye along the seam with the lights off. Any pinpoint of light is an open path for air and water. From outside, a dark streak of dirt washed down the log below a joint tells you water has been running behind the bead, not over it.
If water has been getting in for a while, the sealant is no longer the only question. Wet log ends and the underside of a failed joint are exactly where rot starts, and that is worth catching early. Our post on the warning signs a log home is overdue covers what else to look for while you are out there.
What a proper repair looks like
Spot repair is legitimate work and we do plenty of it. A failed run gets cut out back to sound material, the log faces get cleaned so the new bead has something to grab, fresh backer rod goes in at the right depth, and the new sealant is tooled to match the profile and texture of the original line. Color-matching an old chink line is its own small art, and the joint next to a twenty-year-old bead will never be invisible on day one. It weathers in.
When more than roughly a third of the seams on a wall have gone, spot work stops making financial sense. At that point you are better off pulling the wall back to a known state: strip the old sealant, address any rot, treat the bare wood with a borate preservative while you have access, and re-chink the whole elevation so every joint is the same age and the same product. That usually happens alongside a re-stain, because the two jobs need the same access and the same scaffolding. The full restoration walkthrough lays out how those steps stack up.
One practical note: sealant and stain have to be compatible, and the order matters. Chinking applied over a slick film-forming finish has far less to hold onto than chinking applied to prepared wood. If someone quotes you a re-chink without asking what is on your logs, that is worth a follow-up question.
How this fits the rest of your maintenance
Chinking is not a standalone chore. It is one part of the envelope, and it ages on roughly the same clock as everything else on the wall. When we plan restoration work on a log home, sealant inspection happens at the same walkthrough as the finish assessment, because the answer to "does this need a maintenance coat or a full restoration" usually changes what makes sense for the seams. If you are already tracking your re-stain interval, and there is a whole post on how often that comes due at our elevation, add a seam check to the same spring walk. It takes ten minutes and it is the cheapest inspection you will ever do.
Not sure whether you are looking at a cosmetic crack or an open wall? Send a few close-up photos or request a free estimate and we will tell you honestly whether it needs attention this season or whether it can wait.